curls

Curly Girl Review: it’s a 10

5611BF6E-9BAA-4B25-A742-CDF8F80BD1F8

With a name like “It’s a 10” you can’t help but have high expectations that you’re about to have a bomb wash and go. Am I right?! So did the product live up to its name you ask?

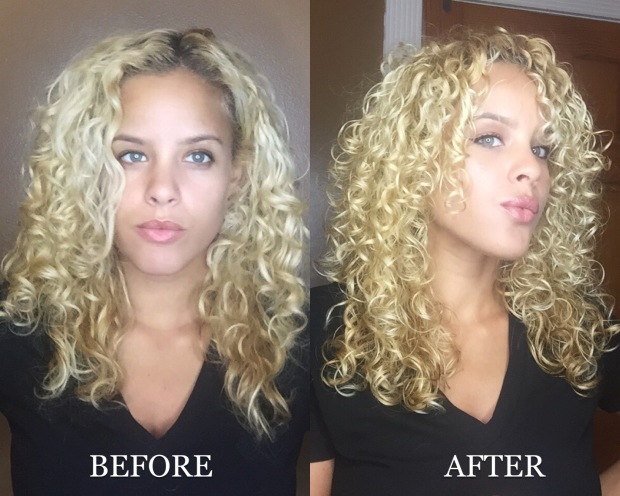
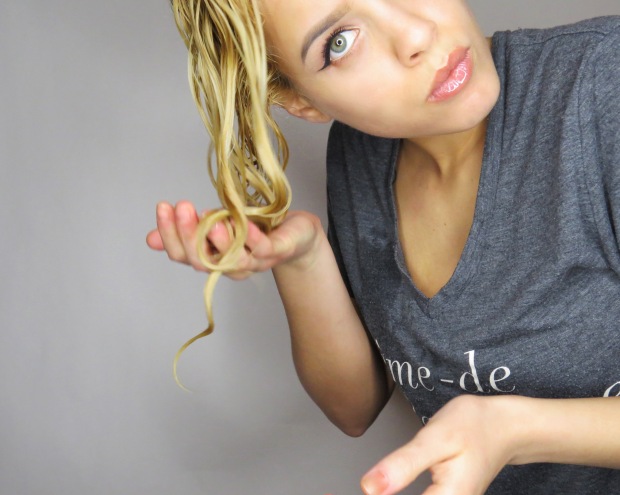
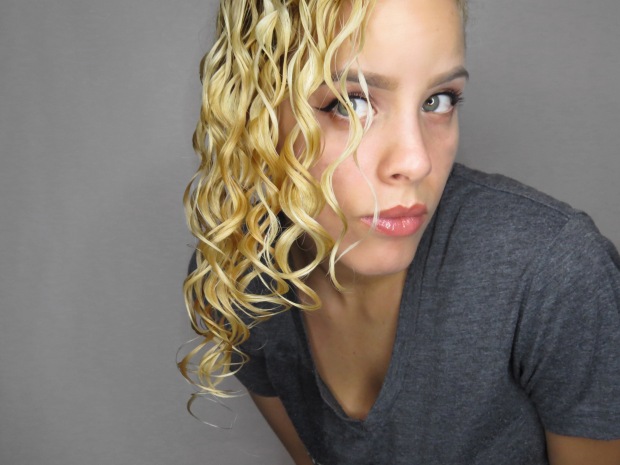
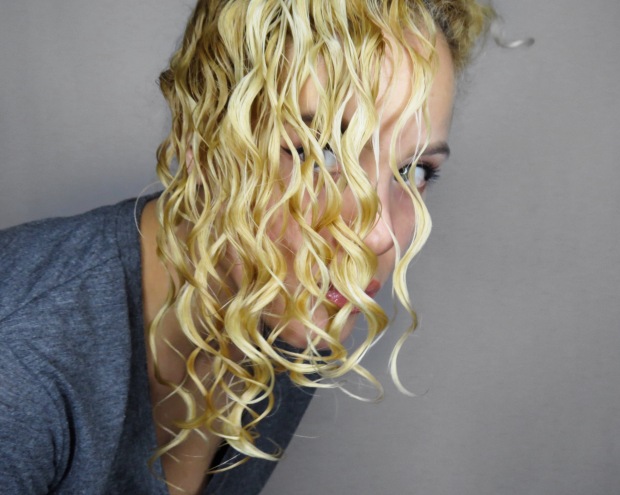
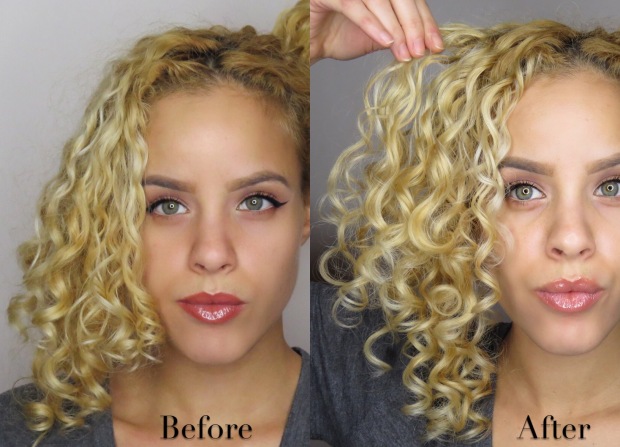
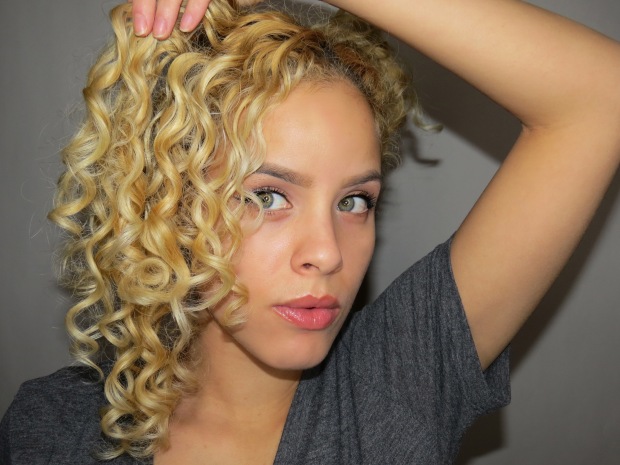
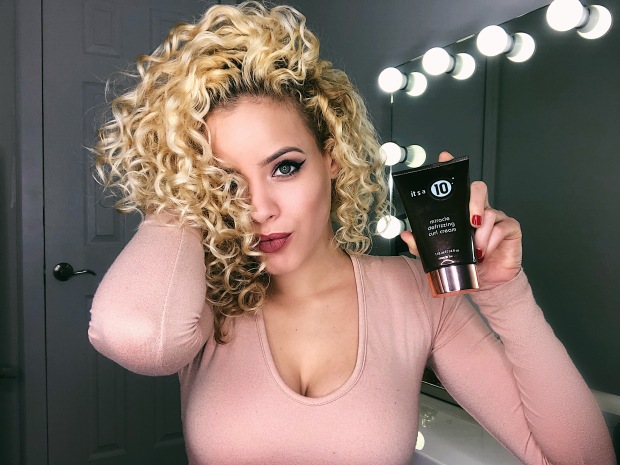
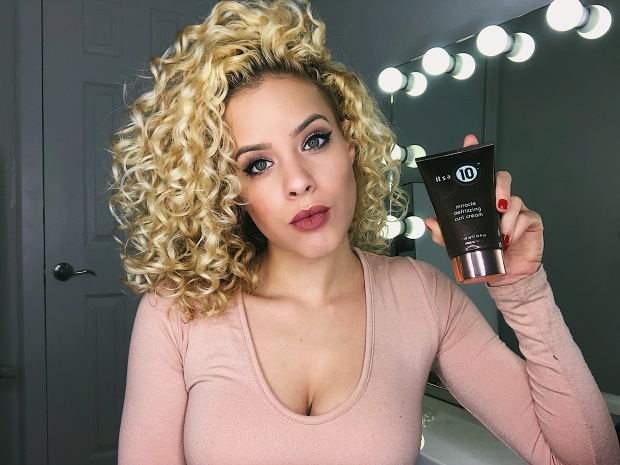
I had the chance to use this product twice before writing this review and the answer is yes! Just as the name states, it’s a 10! I loved my results. It defined my spiral curl pattern, while leaving my hair very soft and manageable. I love a product that can define my curls and still give me soft fluffy hair with no stiffness or “crunch.”

The two main reasons I was pleasantly surprised and won over by this product:

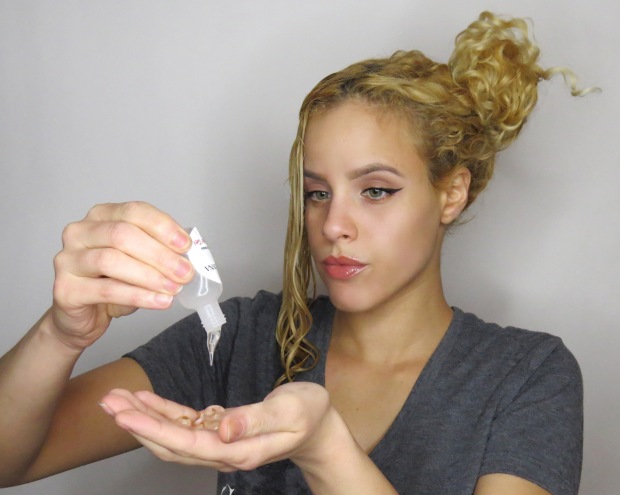
1. I’ve mentioned in previous posts how I prefer not to use hair styling creams on my first day hair as it tends to weigh down my curls. When I try out a cream on my wash day, I go into it not expecting any spectacular results. However, this styling cream proved me wrong! It was light weight, and gave me defined curls with a hold.

2. This was by far one of the easiest wash days I’ve had! My wash days usually consists of a mixture of products from washing to styling products. I call it my “curl cocktail” lol. With It’s a 10, I only had to use two products; one to cleanse and condition in one step and one cream for styling. With this one cream, I got the same great results compared to when I use a mixture of two to three styling products. That, I have to say was impressive. Especially because creams usually don’t work for me.

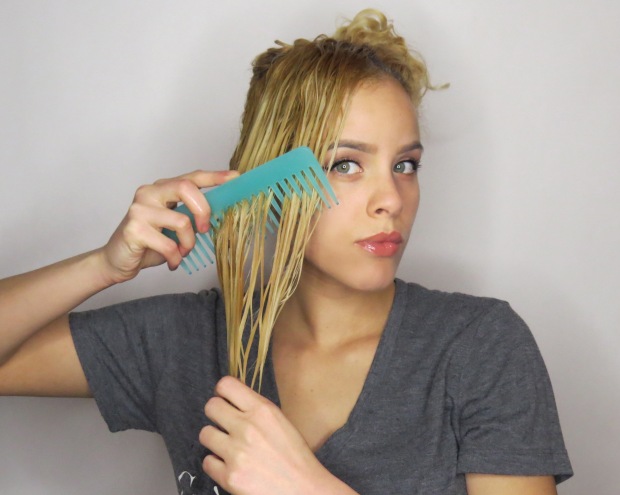
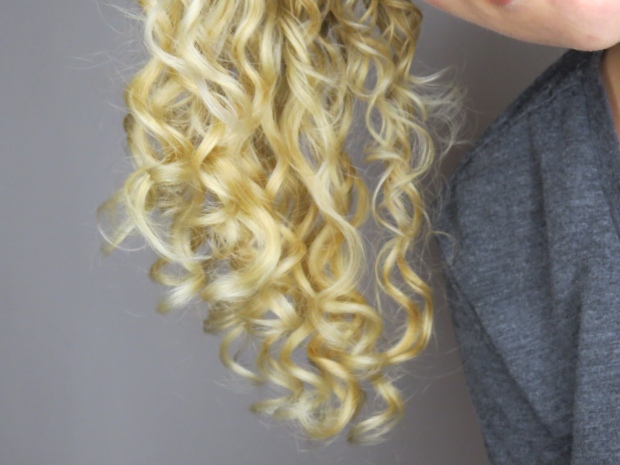
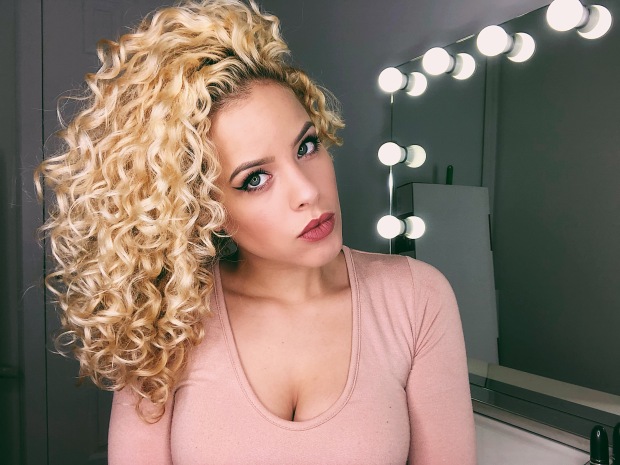
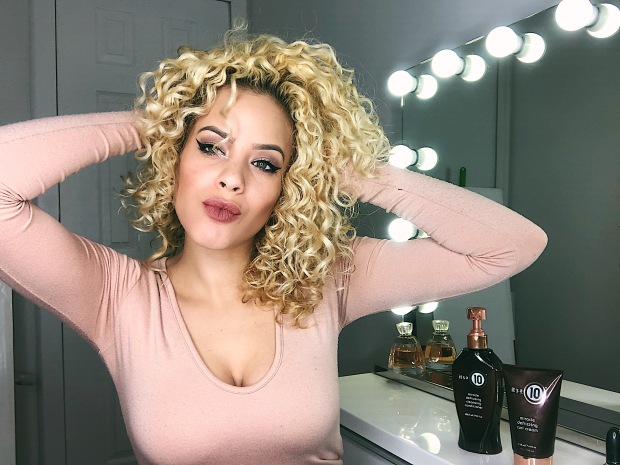
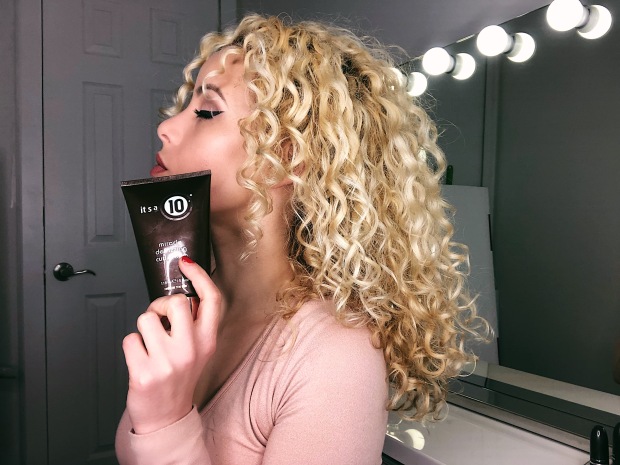
Take a look at my results!

Processed with VSCO with 6 presetProcessed with VSCO with 6 presetProcessed with VSCO with 6 presetProcessed with VSCO with 6 presetProcessed with VSCO with 6 preset

Side note: Along with a well working product, a great curly cut can help advance the look of your curls as well! I have what’s called a RëzoCut (click on the link to see previous post on my first RëzoCut experience) done by Nubia at Utopia Day Spa & Hair Salon

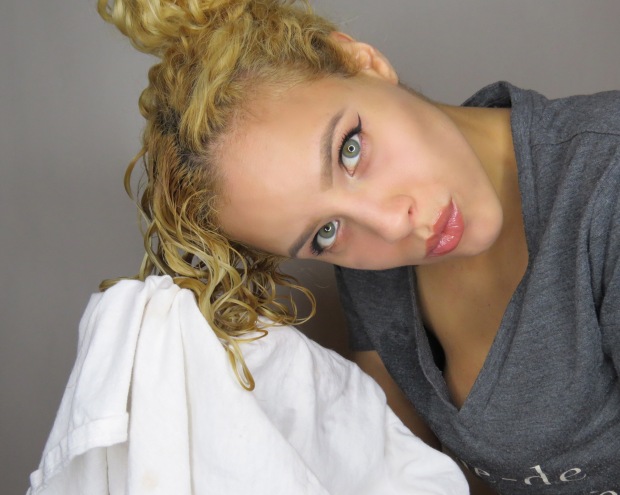
Also, if you’re curious about how I dried my hair…I air dried it for about an hour, then finished drying it with a diffuser.

Until next review…thanks for stopping by! xo

My (updated) Wash and Go Routine


My go-to wash and go routine still includes DevaCurl, but I switched the product line up a bit. This routine has been responsible for most of my good hair days lately…so of course I had to share my new holy grail!

Step by step instructions:

1. Cleanse hair with DevaCurl’s No Poo followed by DevaCurl’s One Condition

2. A good deep conditioning can give your hair a major boost! I like to use DevaCurl’s Melt into Moisture. I apply it after washing my hair, afterwards I put a plastic cap and leave the treatment on for at least an hour.

3. After rinsing off the treatment, do not dry your hair with a towel. (If you apply the product while your hair is still very wet, it will result in more defined curls with less frizz). Split your hair into two parts and apply a little bit of the One Condition (I like to use it as a leave in). Use the raking method to evenly distribute it throughout your hair. Repeat on the other side.

4. Flip your head upside down and gently shake out the roots with your finger tips.

5. Scrunch DevaCurl’s Light Defining gel onto your hair. Keep scrunching the product onto your hair until your whole head of hair is saturated in the product. As you’re scrunching you’ll squeeze out some of the excess water. Also, squeeze and hold for a few seconds to help define your curl pattern.

6. Repeat the scrunching process again, but this time with DevaCurl’s B’Leave In gel

7. Scrunch and shake out your hair one last time. Then take a microfiber towel and  squeeze out all the excess water.

8. Shake out your hair and flip your head back up. You can now go ahead and create a part. I usually part my hair to the side but feel free to do a middle part or let your curls kind of fall into place.

9. Finally, you can air dry or use a diffuser to dry your hair. I prefer to air dry when I have the time.

BA4C1FF9-2F43-422B-9290-DDC8F591442E

Curly Girl Review: Rapunzel “The Future of Hair”


IMG_7926

Hey curl friends, who wants to know what hair products I used to achieve these awesome results?! I had the pleasure of trying out some great products from Rapunzel. The end results left me with soft and shiny curls.

I used the following products from the Rapunzel line:IMG_7935

Rapunzel’s Hair Silk: made to smooth ends, condition, and when used daily aids in minimizing breakage and damage caused by chemicals and heated styling.

I loved that this product helps to protect your hair from chemical damage, since I dye my hair often. This oil also gave my curls some amazing shine! You can clearly see the difference in the photo above. In the “before” photo my hair looks dry and dull versus the “after” photo where my curls look shiny, moisturized, and even glisten in the light.

Rapunzel’s Hair Lotion: A deep moisturizing cream made with Shea Butter and other natural oils that promote healthy hair growth while protecting the hair from damage.

I was amazed how soft this cream left my hair…and when I say soft I mean SUPER-DUPER soft! (yes, I said super-duper I had to emphasize on how soft my tresses were! lol)  My comb and fingers literally glided through my hair, melting away any signs of knots that were ever there. It also did a great job at adding moisture to my hair and making it more manageable.

Rapunzel’s Hair Therapy: Hair multivitamins that help prevent hair loss and breakage from occurring.

I have been taking these vitamins consistently for a few days now and I believe I will see results. These vitamins contain a perfect dose of iron, which is an important ingredient when trying to promote hair growth because it carries oxygen to your roots.

Here are some more “after” photos…just because who can resist taking selfies when your new hair products are giving your hair LIFE!…haha.

What do you guys think of my results? I loved the outcome, whats not to love about healthy, silky, and shiny looking curls! If you’re interested in seeing a step by step on how I applied the product press play in the video below:

To find out more information or purchase any Rapunzel hair products please visit Rapunzelthefutureofhair.com

Screen Shot 2016-06-18 at 4.27.45 PM


Curly Girl Review: Madonna & Co Miracle Hair Gel

miracle gel

A curly girl can never have too many hair styling products! Today, I’m sharing my results after using Madonna & Co’s new Miracle Hair Gel. For those of you who are not familiar with Madonna & Co, it’s a boutique and beauty bar. It’s a place that brings together beauty and fashion all under one roof. Although their beauty bar deals with all hair types and textures, they do specialize in curly hair. With that being said, they have created a new miracle gel formula to target frizz.

I was lucky enough to try their new product. I received a small sample size bottle of the Miracle Hair Gel. Because I wanted to see it’s true affect on my hair, and knew the small bottle would not be enough to distribute evenly all through out my hair, I decided to test it out on a smaller section of my hair. I made sure to apply the product in my hair while it was still very wet after washing, I then let it air dry. After it was a hundred percent dried I was able to compare and see the results. The gel had given me nice “S” shaped curls (or ringlets, which ever phrase you prefer). I had VERY nice curl definition with minimum frizz, which I loved! The gel had a light hold and didn’t weigh my hair down at all, nor did it leave my hair stiff but rather soft.

Take a look at how I used the Miracle Hair Gel and the final results:

1. I parted a small section of my hair and washed that section, getting it all ready for the product.

IMG_3489

2. I applied the gel on my hair and then combed it through with a wide tooth comb to help distribute the product throughout my hair.

image2 (6)image1 (4)

3. I then scrunched my hair upwards towards the roots. (Because I apply the product on my hair while it’s still very wet, it is normal to see the product all in between your fingers). I continue to scrunch and hold a few more times.

IMG_3495

4. I used a cotton t-shirt to squeeze out any excess water.

IMG_3497

5. Then I just waited around until my hair dried…meanwhile take a look at what my curls looked like right after applying the gel:

IMG_3493IMG_3496

6. Here are the final results:

image1 (7)

IMG_3500IMG_2298

Want to try this new product for yourself? Purchase the Miracle Hair Gel or learn more about it at www.madonnaandco.com

Until next review my curly loves! xo